Dreaming of walls that feel like home — warm, textured, and filled with personality? With just a few leftover fabric scraps, you can create stunning DIY wall art that blends effortlessly into your home’s aesthetic. Whether your style leans toward cozy wall art, quiet luxury, or textile wall decor, this project is proof that easy DIY home decor can be both beautiful and budget-friendly. Ready to transform your space with fabric art for walls that feels truly personal? Let’s begin.
Why Your Walls Deserve More Than Mass-Produced Prints
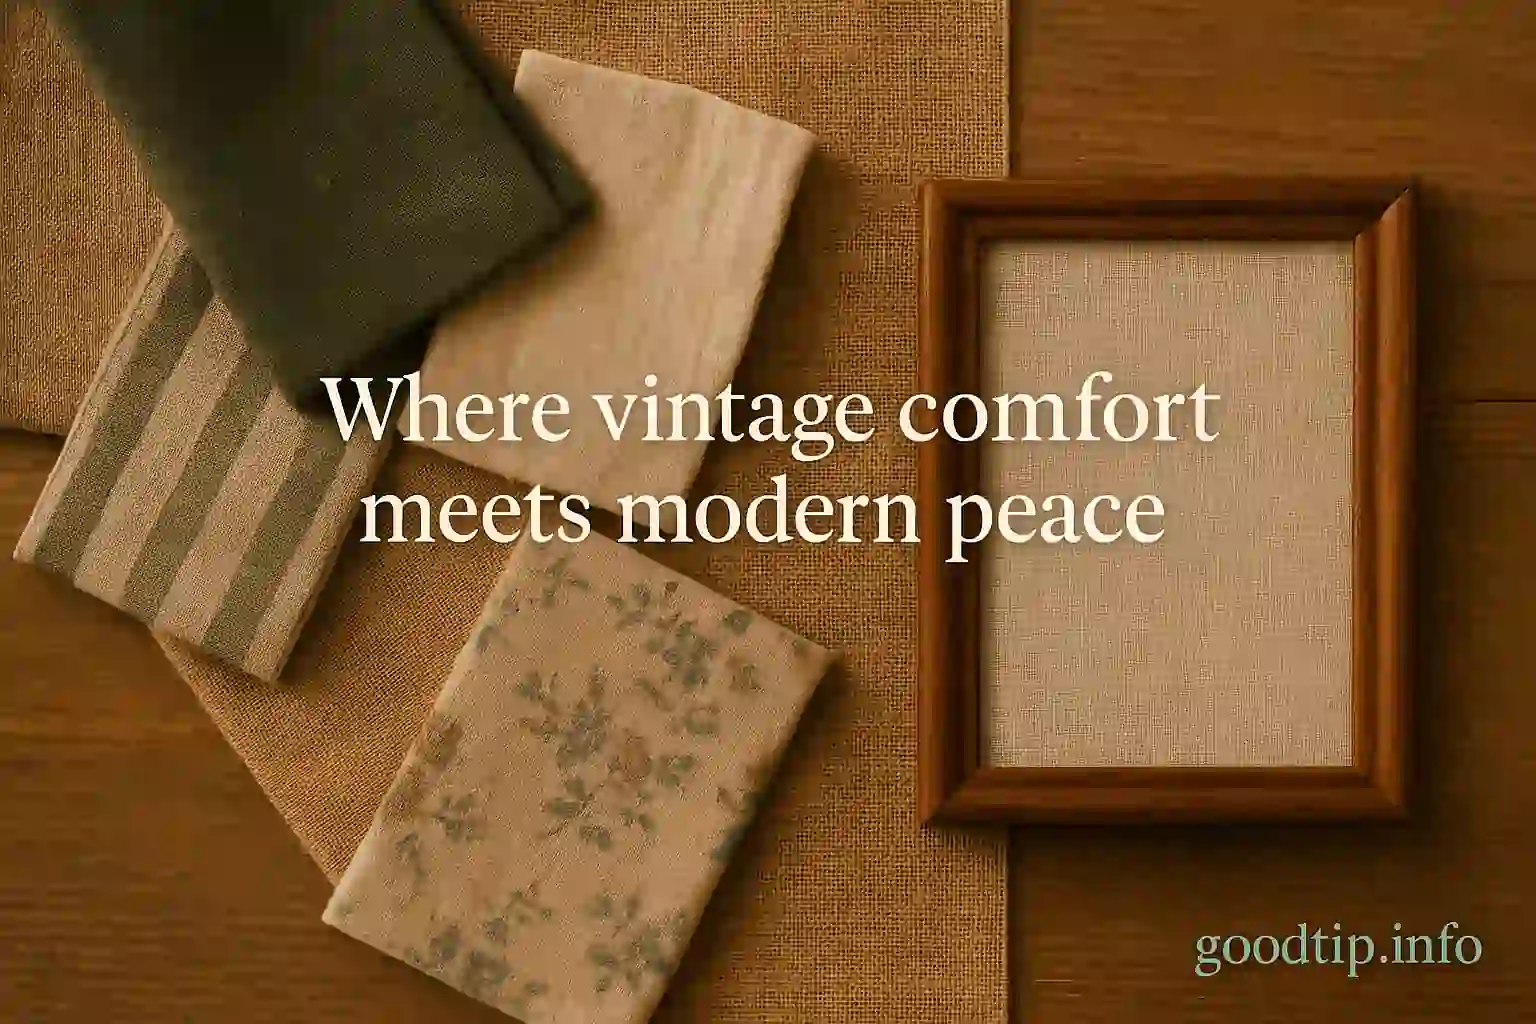
In a world filled with fast décor and generic wall art, there’s something incredibly grounding about creating pieces with your own hands — especially when they carry personal meaning. DIY framed fabric wall art is not just about filling a blank space; it’s about storytelling.
Each scrap of linen, gingham, or floral cotton might be a remnant from an old tablecloth, a favorite shirt, or a vintage market find. And when framed thoughtfully, these textures don’t just decorate — they speak. They soften hard lines, bring calm to the visual landscape, and invite memory into every corner of your home.
Try this next: Gallery Wall with Botanical Prints | Vintage Meets Modern Calm
The Aesthetic: Where Cozy Minimalism Meets Quiet Luxury
Let’s talk mood: this project embodies the best of cozy minimalism, where less is more — but never cold. It embraces the tactile richness and natural palette of quiet luxury, a trend that prioritizes quality, texture, and timelessness over excess. And for those who appreciate a touch of nostalgia, it leans gently into the romanticism of vintage aesthetics.
This art isn’t bold or loud. Instead, it whispers. It draws the eye in slowly, calming the space with its tactile surfaces and neutral hues. Whether you hang one piece or curate an entire gallery wall, the result is intentional, soothing, and filled with quiet charm.
Materials You’ll Need: Gather Your Fabric Memories
You don’t need a studio or a sewing machine — just a few basic tools and meaningful materials:
🧵 What you’ll need:
- Linen, cotton, gingham, floral, or vintage fabric scraps (iron them first!)
- Wooden or thrifted frames (A4 to poster-size works well)
- Cardboard, foam board, or sturdy paper as a backing
- Fabric scissors
- Spray adhesive or double-sided tape
- Optional: a ruler or cutting mat for precision
- Wall hooks or adhesive strips
Tip: Choose fabrics that speak to you emotionally. That old napkin from your grandmother’s drawer? A piece of your favorite worn-out shirt? Perfect.
Step-by-Step Tutorial: Framed Fabric Art Made Easy
Here’s how to turn forgotten fabric into framed masterpieces:
Step 1: Select and Iron Your Fabric
Pick pieces with subtle patterns, natural textures, or soft florals. Iron out any creases to ensure a smooth finish.
Step 2: Cut the Backing Board
Use your cardboard or foam board to create a backing that fits snugly into your frame. This will hold the fabric flat.
Step 3: Mount the Fabric
Lay the fabric face down and center the backing board on it. Wrap the edges of the fabric around the board and secure with spray adhesive, fabric glue, or strong double-sided tape. Pull it tight so it’s smooth and taut.
Step 4: Frame It
Insert the mounted fabric into your frame just like you would with a photo. If your frame has glass, you can choose to remove it for a more tactile, raw look.
Step 5: Hang and Enjoy
Use adhesive wall strips for a no-damage installation, or traditional hooks if you prefer. Display solo or in a group — both are beautiful.
Styling Tips: Where and How to Display Your DIY Art
The beauty of fabric scraps home decor is how versatile it is. These pieces blend effortlessly into a variety of rooms and styles.
- Living Room: Mix frames of different sizes above a sofa or reading nook for a cozy, curated feel.
- Bedroom: Choose soft florals or linens in calming tones for a serene headboard gallery.
- Hallway or Entry: Add unexpected softness and interest to transitional spaces.
- Kitchen: Gingham and vintage florals feel right at home near open shelving and natural wood.
Combine them with other natural textures like jute rugs, rattan, dried flowers, or ceramic accents. They also look stunning when leaned against a wall on a shelf — no nails required.
Sustainability and Sentimentality: Why This DIY Matters
This project isn’t just about decorating — it’s about intentional living. By reusing fabric scraps, you’re reducing waste and giving materials a second life. And unlike mass-produced art, this is a reflection of you — your style, your memories, your touch.
In a time when homes are increasingly seen as sanctuaries, adding emotional depth through handmade, meaningful art is more relevant than ever. This is your story, in texture.
Final Touch: Your Home, Your Story
You don’t need to be a designer to make your space feel beautiful — you just need to be willing to try. This simple DIY framed fabric art project is proof that small, personal touches can completely transform a room.
So open that drawer of old linens. Visit that thrift shop down the street. Look at your walls not as blank canvases, but as opportunities for reflection, calm, and warmth.
💫 Inspired to start?
✨ Glow Up Your Space — Save and Start Today
✨ Your Dream Space Starts with a Save
Save it. Share it. Start your fabric story.
Because sometimes, the most meaningful art isn’t bought — it’s made.